
To all the potential tech and 3D model nerds scrolling my page, or if you've stumbled upon my Skylanders rips online, (which haven't been approved to The Models Resource yet at the time of writing this) I've decided to make a post explaining Skylanders Superchargers models and how to properly set up the nodes in Blender! This probably works for the models from other games but I haven't gotten around to ripping those apart yet.

Blender Render of Lava Lance Eruptor with a basic lighting setup
For this particular instance I'm going to be using the WiiU models that I ripped. And I'm going to be using Eruptor since he is a good instance for having all of the textures I need to cover.
 No extra textures plugged in yet...
And the Shading tab in the top of the screen is where most of our work will be carried out.

As you can see, those blocks below are nodes, and that large green one is where everything will be plugged into. Add more image texture blocks and find the textures that correspond to your part.


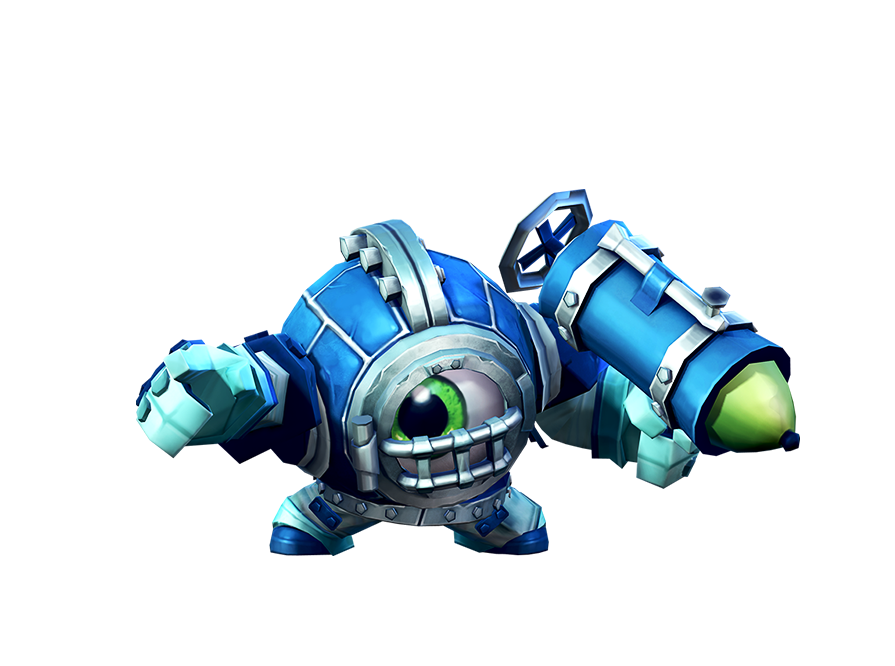
First thing's first, import the DAE of the Skylander you're using (yes, this tutorial is for beginners too) and you might have a fully textured model already. If it doesn't have textures already hooked up then... oops. First thing might look nice already but it doesn't have any of the extras plugged in, you're going to have to do that yourself.
And the Shading tab in the top of the screen is where most of our work will be carried out.


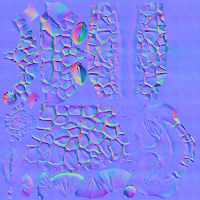
These are the textures we are using, in reading order we have the Color, Composite, Normal, and Emissive maps
Just plugging these in directly won't do much, a lot of these have prior setup required. Let's start off with the composite since there isn't too much difference from adding it unless it's a metallic prop.
Add a Separate Color node and connect the composite, and plug the green channel to specular and the blue channel to metallic. One of the more simple node setups. Now for the emissive:


Now set your color mix node to Multiply and the factor to 1.000 and now the result good for plugging in! You can adjust the emission strength to your liking for however bright you want the lava to be.

Now for the normals which are the most important texture, even if you don't want the other textures, I would recommend adding the normal map. Skylanders has a strange problem with normals where the red channel is inverted, but luckily Blender can fix it no problem with one extra step! To fix the normals add a RGB Color Curve node and plug in the normal, flip the red channel in a straight line.

Now for the normals which are the most important texture, even if you don't want the other textures, I would recommend adding the normal map. Skylanders has a strange problem with normals where the red channel is inverted, but luckily Blender can fix it no problem with one extra step! To fix the normals add a RGB Color Curve node and plug in the normal, flip the red channel in a straight line.
(Click to enlarge the images if you need to understand this step better)
Now add a Normal Map node from the vector node section and plug the curve output into that node. The normal can now be properly plugged in!

Before and After adding the nodes
Have fun messing with your models now!

No comments:
Post a Comment